Wednesday, December 17, 2014

Funky Distressed French featuring Born Pretty Store Bow Studs

Hi everyone! It's 8 days before christmas, whoa time flies really quick. Have you finished your christmas shopping yet? I have not :p Should get them done this week, I hope..

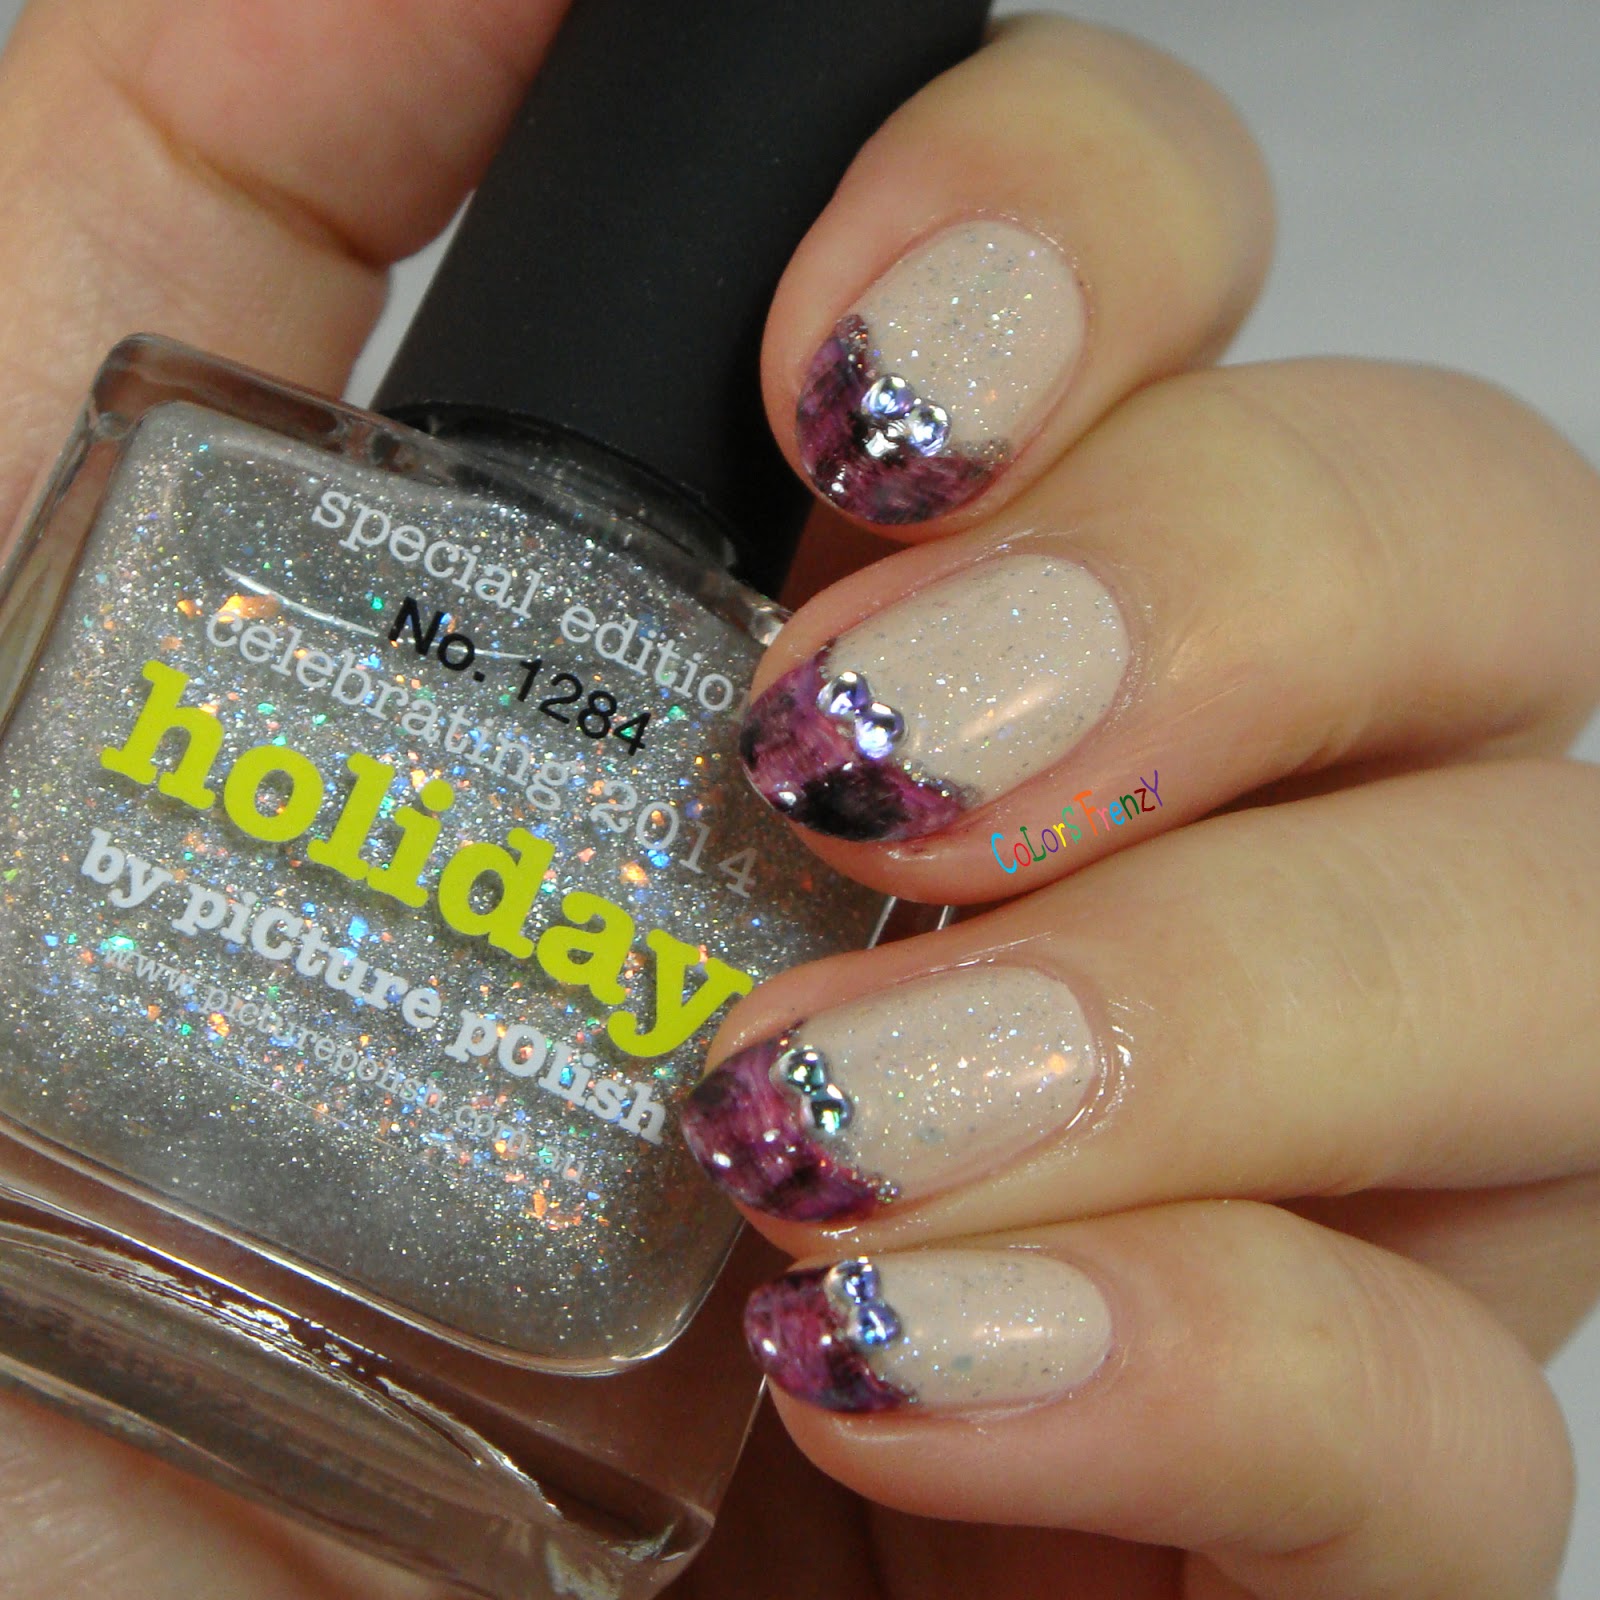
Anyway, today I have a pretty simple nail art to share with you. I'm calling it a distressed french mani, because well.. the french part is done with a distressed technique. 
The base color is piCture pOlish Beige, topped with the new LE Holiday. I used a flat end brush to do the french and several polishes (OPI Sleigh Parking Only, OPI I Carol About You, piCture pOlish Sizzle, and Cirque Memento Mori). I added a little bit of glitter on the smile lines using OPI My Voice is a Little Norse. 
To sweeten it a bit, I add a tiny bow stud on each nail, then sealed everything with HK Girl top coat.. The studs are from Born Pretty Store, and you can find it here. There are 250 studs in the set for only $3.70. You can also use my code NVG10 to get a 10% off of regular priced items.


How do you feel about french mani? Honestly, this is totally not my style, but I like to do it once in a while to see if I changed my mind about it. Haha.. nope, still not my style.

XO
Novi

Monday, December 15, 2014

piCture pOlish Lollipop

Hi guys! How was your weekend? I (finally) went to see Mockingjay, and cannot wait to see the part 2! And no, I didn't do any Hunger Games/Mockingjay mani when I went. I'm wearing the polish that I am showing you today, the new collaboration shade by piCture pOlish and Nail Polish Canada, called Lollipop. A very fitting name!
Just in case you didn't know, NPC almost always include a sweet treat in your order, lollipop. When I didn't find any of those little suckers in my package, I feel like I've been bad or something, no treat for me! Lol!


piCture pOlish Lollipop

Lollipop is a purple glitter bomb in a lightly tinted base. It's sheer in the first coat, but you can get full opacity in three thin coats, like what I used here. Due to the amount of glitter in it, the top of bottle neck where you brush off the excess polish can get thick and goopy. Just be careful not to transfer that onto the brush and then your nails. I recommend using peel off base or foil method for removal. 
I had this on the whole weekend, and totally loved it! It has a glow from within look, so beautiful!

I did lollipop nail art (bet you didn't see that coming :p) on two accent nails, using white acrylic paints, various piCture pOlish shade (Wisteria, Tiffany, Flirt, Citrus), and OPI Good Grief!. Sealed the mani with piCture pOlish Gloss on Top top coat.


Lollipop is sold exclusively at Nail Polish Canada. Will you be adding this to your collection? 

XO
Novi

Friday, December 12, 2014

Poinsettia Nails

Hi guys! Happy Friday! I have a holiday themed mani for you today. I created this mani for a nail art contest hosted by Pueen Cosmetics and Chit Chat Nails, today is the last day to enter, you can see the contest details here
I'm not very creative with my stamping, so I did what I can. I also tried making stamping decals for the first time here, which luckily turned out ok. I kinda misjudged the size of the images I used, and they almost completely covered up the pretty background. Which of course, I forgot to take pics of cause I was 'in the zone', haha. It's pretty much the same technique I used for the background of my stamping here and here.


For the background, I used polishes from NYX Love is in The Air set that I just got as one of my late birthday presents. I used the images from Pueen Buffet set plate SE01B & SE04B, OPI Christmas Gone Plaid for the green stamping. Mundo de Unas black as the frame for the poinsettias, and filled in the flowers with OPI What's Your Point-settia? and Good Grief!. I dotted a tiny bit of Fairy Dust in the center of the flowers, then sealed with HK Girl  top coat.


I am liking this decal method, now that I kinda know the tricks, it was fun to do! And fingers crossed that I win, would love to have plates with my name engraved on it. But there are many amazing entries! You should check it out on instagram #celebratewithpueen, or enter yourself :).

XO
Novi

Monday, December 8, 2014

Penguin Santa & Elf

Happy Monday! Hope everyone had a relaxing weekend. I was finishing my crochet project while watching Supernatural and Sherlock Holmes on Netflix. The project is almost done now, so yay!
I saw a short video a few days ago on my facebook feed of a bunch of penguins dressed in santa costume, so freaking adorable! I couldn't find the video anymore, I think it was one of those sponsored posts. That video inspired today's mani, though my mani doesn't have the same cute factor as those penguins. I tried, haha.


Santa and Elf penguins were painted with acrylic paints over China Glaze Glistening Snow. I use my new OPI for the rest of the nails, I Carol About You and Snow Globetrotter. I sealed the mani with HK Girl top coat.


XO
Novi

Friday, December 5, 2014

Tape Mani w/ Glam Polish Fantasies Come True & Girly Bits Selfie Bomb

Happy Friday! I'm sharing what I planned to be my weekend mani, but now I'm not sure if I want to keep them. 
I used Girly Bits Selfie Bomb, from my untried stash, and paired it with Glam Polish Fantasies Come True, with some striping tape to do the design. It wasn't inspired by anything, I just went with what's in my head, so I don't really know what to call this, haha.


I have to admit, the only reason I still have these on is because it took a while to get these done. I have a love and hate relationship with striping tape, but I keep coming back to it, that's the love part I guess, lol. Have a great weekend guys!

XO
Novi

Wednesday, December 3, 2014

piCture pOlish Hope - Snowflake'd

Hi guys! I was loving all the snowflake mani I saw on Monday, so today I want to have them on my nails. With my choice of polish today, this mani was done real quick, since I didn't really want to cover up the pretty base colour.

I used 3 thin coats of piCture pOlish Hope, although 2 would've sufficed. Perfect formula, and the sparkles are just so gorgeous!
piCture pOlish Hope

piCture pOlish Hope

piCture pOlish Hope
For the snowflake stamping, I used the image from Bundle Monster plate H01 and A England Encore Margot. I love that it gives a subtle stamping effect, but lit up when the lights hit them.
piCture pOlish Hope

piCture pOlish Hope
Hope you're all having a great hump day! ;)

XO
Novi

Monday, December 1, 2014

Pink Damask Pattern

Happy Monday guys! How was your weekend? I went to a Grey Cup game yesterday, though I didn't understand football and only started to follow how the game works on the third quarter, I still quite enjoyed it. Live sporting event is always fun to go to!

Anyway, I finally bought some acrylic paints to play with. I have to admit I was struggling with it. I couldn't paint thin and smooth lines with it, it's definitely a learning process. 
Today's mani is another brown & pink combo. I googled pink damask pattern, and there's one that I really like, the design I painted today is a simplified version of it. 

The base is 2 coats of OPI Love Is Hot And Coal. I mixed a red and white acrylic paints to get the pink shade. Sealed off the design with HK Girl top coat.


I like the finished look of these, but they could use more work, look rough and sloppy to me (sorry about the tiny drop of water there, I totally didn't see that until I was editing the pics!). I definitely will be practicing more using acrylic paints. Any tips and trick you have in using it, please feel free to share! :)

XO
Novi

Wednesday, November 26, 2014

Glam Polish Bewitched & MM20

Hi guys! Happy Thanksgiving to all my US readers! I'm totally uninspired to do anything fancy today, so I turned to my stamping plates. I chose my Messy Mansion MM 20 plate again, I just love this plate! 
My base is 2 coats of Glam Polish Bewitched. I used the large dahlia image and 3 shades of Mundo de Unas 15 (Mexican Pink), 24 (Aqua), and 30 (Neon Blue) to do a gradient stamping.  Then I used the small dahlia image, on the lower left side of the plate, and used the pink and aqua shade and stamped over them on a few nails then sealed everything with HK Girl top coat.


I really like how soft and subtle these are, and yet still sparkly. Hope your thanksgiving is wonderful and your tummy is filled with yummy turkey and pies! <3

XO
Novi

Monday, November 24, 2014

Christmas Tartan with OPI Gwen Stefani Holiday 2014

Hi guys! I feel silly for starting the post title with 'christmas' when it's not even December yet, but this mani unintentionally turned out looking christmas-y to me, so I thought maybe this could count as one of christmas manicures idea.
The bf got me 14 of OPI Gwen Stefani Holiday polishes for my birthday, since I don't feel like swatching them today, I did a nail art instead. 


I started with 2 coats of the base color, OPI Red Fingers & Mistletoes, and painted the vertical & horizontal criss cross pattern with Christmas Gone Plaid and First Class Desires, then sealed with HK Girl top coat. These were easy and quick!
I ended up using matte top coat on these, and I think I prefer them this way. What do you think?


XO
Novi

Friday, November 21, 2014

Cirque Back to Basics Set - Review & Nail Art

Happy Friday! Today I have another review of Cirque gift set, and some nail art to go with it. I have reviewed their Ultimate Luxe Gift Set and Ultimate Glitter Gift Set, this one is a perfect set for a nail art lover or any polish lover really. 
Back to Basics Set is a staple set that will get a lot of use, I know because I have used these quite a number of times since I got them. 

The set comes in a clear pouch. Here's what in the pouch:
  • Holdfast™ Base Coat - A garlic-infused base coat that strengthens and anchors
  • Liquid Laminate™ Top Coat - A quick-dry top coat that seals, protects and adds a glossy shine
  • Memento Mori - A black creme
  • Carpe Diem - A white creme


Memento Mori is now my favorite black creme. It's a one coater! Though here I used 2 coats for good measure, plus top coat.
Cirque Memento Mori

Carpe Diem is a bright white, opaque in 2 coats. I thought I saw a very subtle shimmer while applying it, but it's not visible at all on the nails.
Cirque Carpe Diem
Cirque also sent me a crystal nail file and their new Tea Tree cuticle oil that I have been using since I got them, very moisturizing and so great in this cold weather. These make a perfect stocking stuffer! 

For my NOTD, I did a simple nail art with Memento Mori and Carpe Diem. A crescent moon leopard print negative space. I hope my stained nails are not too visible, haha. I kinda love this look, and wish I did the shape better on my middle nail. For my thumb, I did a black & white crescent moon and did the leopard print with Memento Mori and Ica Valley.


This Back to Basics Set and the other gift sets will be available for a limited time only, so make sure you'll get yours from Cirque Colors. These shades can also be purchased individually, if you prefer, from Cirque Colors or their stockists (online/in-store)


**products were sent for my honest review

XO
Novi

Wednesday, November 19, 2014

OMG Nail Strips Review - Lollipop

Hi guys! Today I did a product review of something that I have never used before, nail strips/nail wraps. OMG Nail Strips contacted me and asked if I would be interested in reviewing their products. I hesitated, because honestly, if I could mess up a simple water decal there's a good chance that I might mess this one up too, haha. I went and browsed on their website and saw they have quite a few cute designs that I like, so I decided to give it a shot. They have 2 kinds of nail wraps, stickers and foils. I chose both stickers, which now I regret and wish I chose one of each kind to try. 

Here's the two set I chose, but today I'm only showing you one of them, the Lollipop nail strips.


Each set consists of 14 nail strips of different sizes, you can see the measurement under each strip.  (One of the strip came a bit damaged, but I can still use it without a problem)

There are instructions on how to apply these strips at the back of the package, and you can also watch the application instructions provided on the website.


It took an entire Men in Black movie for me to figure out how to do this properly, and get these done, haha. 

Here are the steps I did for applying these:
  • I wipe my nails with q-tip dipped with remover to get rid of any oil residue on the nail.
  • Measure each strip to fit the nail. Using a small scissor, I cut both sides of the strip so the design still look centered. I also took a bit off from the top of the lollipop so the lollipop stick is more visible, otherwise it's only showing about half than what's showing now.
  • After removing the clear plastic coating and taking the strip off its backing, place the strip on the nail, carefully push down the sides and smooth the surface making sure there are no air bubbles. Orange wood stick helps for pushing the sides down, use it gently. 
  • Cut the left over on the tips if there's a lot of it. I cut and leave about 0.5 cm left to make it easier to file off. When filing off the excess, angle the nail file parallel to the surface you're working on. So you are actually filing off the excess strip and not the tip of your nail.
  • Dipped a q-tip in acetone and lightly dab it on the nail. This step is not written on the package, but it was mentioned on the video. Dabbing the strips with acetone sort of melt the strips and make it adhere better (I think), I didn't do it on the middle nail and didn't notice much difference. If you do, be careful not to nick the nail cause it becomes a bit sticky.
  • Apply top coat. I use OPI top coat for this, as recommended. I tried using HK Girl top coat on my first try, but it didn't go well. The edges were lifting after a few minutes.
The strips remove like regular polish, just use cotton pad/round and polish removal. 


Overall, I'm now more open to the idea of using nail strips, now that I got the hang of it. Though I won't use it for my daily mani (cause I need to wear my nail strengthener and I haven't tested if it will work the same over it), I definitely like this for when I go on a trip. Or just using it for an accent nail. I had to cut all the strips I used to match my nail size, cause my nails are slim. But that really didn't take long at all. I bet next time I can get these done a lot more faster! :)
There are so many selection of cute nail strips on their website. I'm saving the other set for the first snowfall here, hopefully it's sometime before christmas!
Each set retails for USD 7.99, but there's a coupon code you can use to get 5 sets for USD 25.00 (5SET), awesome deal! What do you think? Is this something you might want to try?


OMG Nail Strips: Shop - Facebook - Instagram


**product was provided for my honest review


XO
Novi

Tuesday, November 18, 2014

KBShimmer (part of) Winter Collection - Swatches & Review

Hi everyone! Today I have swatches of some of the polishes from KBShimmer Winter 2014 collection, Katie from Harlow & Co. was kind enough to sent me these to review. From the swatches I have seen, I'm loving quite a few of the crelly glitter from this collection. I have 2 crelly glitter and 2 textured glitter to share with you. 


Mauve on Over, is a light mauve crelly base filled with orange, aqua, and navy glitter. I really like the formula in this one. Thin but not too thin that it would flood your cuticles, the glitter distribution is even and effortless. I used 3 thin coats for my swatches, and 1 coat of Clearly on Top.
KBShimmer Mauve on Over

KBShimmer Mauve on Over

KBShimmer Mauve on Over

Let's Sleigh Together, a pale gray crelly filled with green and blue hexes. I really liked this one when I first opened the package. For me, application was not as smooth and easy as the other KBShimmer crelly I have, but I still like the end result. I didn't get enough glitter on the brush (even after mixing the bottle with a tooth pick) as I would've liked. I use 4 thin coats and top coat here. The formula is thin but applies easily and the amount of coats I used doesn't make it look thick at all. 
KBShimmer Let's Sleigh Together

KBShimmer Let's Sleigh Together

KBShimmer Let's Sleigh Together

Dressed to Gild, this is another one from KBShimmer textured line. It's loaded with tons of gold holographic glitter, and hints of purple and green glitter which make it look even better! I only used 2 coats here, easy application even with the super loaded glitter, that's pretty amazing. Here's the textured look.
KBShimmer Dressed to Gild

KBShimmer Dressed to Gild

KBShimmer Dressed to Gild
With 1 coat of Gelous and 1 coat of Clearly on Top.
KBShimmer Dressed to Gild
Added matte top coat.
KBShimmer Dressed to Gild

Turnip the Beet, another textured polish in the collection. It's a berry pink base loaded with magenta, purple, and red glitter. Also opaque in 2 coats. Top coat really brings the sparkles alive in this one, but it also seem to make it look a bit less opaque. I really like this one with a matte top coat. Below is the textured look.
KBShimmer Turnip the Beet

KBShimmer Turnip the Beet

KBShimmer Turnip the Beet
With one coat of Gelous and one coat of Clearly on Top.
KBShimmer Turnip the Beet
Added matte top coat.
KBShimmer Turnip the Beet
Harlow & Co. will be restocking KBShimmer line, including the new Winter 2014 collection, tomorrow November 19th at 12PM EST. So set your timer and get your wish list ready! ;)


Harlow & Co.: Shop - Facebook - Instagram - Google+ - Pinterest

**products were sent for my honest review


XO
Novi