Thursday, May 29, 2014

Girly Bits Remember Aja

Hi everyone! Today I have a beautiful charity polish, created by Pam of Girly Bits. For every bottle sold, $3 will be donated to www.rememberaja.org. This polish was created in loving memory of Aja Chandler, inspired by her favorite colour. You can read more details about it here, and here to educate yourself about the danger of 'The Choking Game'.
Girly Bits Remember Aja

Remember Aja is a purple holographic with pink shimmer. The holo effect is not a straight up linear, but more like what is now known as bijou holo. I really like this type of holo. I used 3 coats for my photos, it was opaque in 2 coats but the third coat gives an extra depth when it's exposed under bright light. I just loved how the pink shimmer twinkling with the holo. 


Girly Bits Remember Aja

Girly Bits Remember Aja

Girly Bits Remember Aja


If you are a purple lover, you need to add this one to your collection. Remember, it's for a good cause :)


XO
Novi
**product is sent for my honest review

Monday, May 26, 2014

Sorbet Gradient with OPI Neons

Hi guys! After swatching the OPI Neons, naturally I felt the need to do some nail art with these bright colors. So today I did an easy one. Gradient. I'm always tempted to do gradient when I see colors like these. 

I did the gradient over 2 coats of Put A Coat On!, and used 5 of the Neons. The one I didn't use was Down To The Core-al. Then I added stripes as an accent using You Are So Outta Lime, I thought it looked interesting. But it's more because I want my favorite shade to stand out :p
I finished everything with one coat of Glisten & Glow HK Girl top coat.


XO
Novi

Saturday, May 24, 2014

Swatches & Review: Neons by OPI 2014 Collection

The collections that I was so excited for is finally here! My local Chatters finally got them, and totally spoiled by the bf who went and got me the entire collection. So now I have swatches to share with you guys. 

You might have heard that neons are notoriously hard to photograph. These are no exceptions. I'm gonna mention all the similarities in these polishes here, they all dry to a semi rubbery finish and 1 coat of top coat is needed. They all also look a little brighter in person than the pictures here, the light box soften up some of the shades. 

Put A Coat On, a white base released with the collection to boost up the colors. I used 2 thin coats for all the swatches, it is fairly easy to apply compared to regular white polish and not thick. 

You Are So Outta Lime!, my favorite of the collection! While I wouldn't call this neon, this is still a really nice bright lime shade. I used 3 thin coats over the white base. 
OPI You Are So Outta Lime!

OPI You Are So Outta Lime!
Down To The Core-al, a bright neon coral shade. It leans more orange on my skin tone and the most difficult to capture. There's a really subtle sheen in it, more visible in person. A bit streaky on the first coat, but leveled up itself and top coat smooth out the streak. Also used 3 thin coats.
OPI Down To The Core-al

OPI Down To The Core-al
Push & Pur-Pull, a bright purple, but not quite a neon. This one gave me the most problem, had to use 4 thin coats. I find this one is not as streaky when not applied over the white base. 
OPI Push & Pur-Pull

OPI Push & Pur-Pull
Hotter Than You Pink, a neon barbie pink. The pics are not showing the brightness accurately. This is much brighter in person! I also used 3 thin coats here. Like Down To The Core-al, this one also has a subtle shimmer in it.
OPI Hotter Than You Pink

OPI Hotter Than You Pink
Life Gave Me Lemons, a bright- almost neon yellow shade with green undertone. I said almost neon because while this is really bright, I've seen a brighter yellow neon. I used 2 coats over the white base.
OPI Life Gave Me Lemons

OPI Life Gave Me Lemons
Juice Bar Hopping, an orange neon, the brightest and most neon in the collection! If you think the pics look bright, it's even brighter in person. Blinding. You'd want this. I used 3 thin coats.
OPI Juice Bar Hopping

OPI Juice Bar Hopping
I'm also showing you how these look without Put a Coat On. Below, all the shades are shown over regular base coat, and 3 coats of the shades. You probably won't notice much difference, but in person it's really noticeable. Without the white base, they are not bright at all, except for Juice Bar Hopping.


Overall, it's a half neon, half brights collection. There are some that I really like, like You Are So Outta Lime, Juice Bar Hopping, and Life Gave Me Lemons. Which one is your favorite?
Neons by OPI and Put A Coat On! can be purchased from your local professional salons, or online from Nail Polish Canada.

XO
Novi

Wednesday, May 21, 2014

Pink Checker with Too Fancy Lacquer Lovelock Duo

Sometimes, there's a day when you just want to paint your nails.. after you just painted them. That day for me was yesterday. I had a lovely shade on my nails, but seeing that today is going to be sunny, I felt the need to wear something bright. I remember I've had these gorgeous duo for a while now and have not had the chance to put them up here. 

The Lovelock Duo consist of This Love is Smokin' Hot, a bright neon pink with subtle holographic effect, and Love Diamond, a strong linear holographic silvery lilac with hints of pink. My bottle of This Love is Smokin' Hot was pretty thick and almost goopy, but a few drop of thinner fixed the problem. I love this pink! I found no issue with Love Diamond, great formula and opaque in 2-3 coats. 


Too Fancy Lacquer Lovelock Duo

I started this mani with painting all my nails with the bright pink. it dries pretty quick I didn't even need to top coat it before using scotch tape to do the checker. I did put the tape on my hand first to make it less sticky.
Using the tape, I covered the half bottom of my nail and using the polish brush I painted half of the exposed area and pulled off the tape. I did this step to all nails before moving on to do the bottom part. 
Next, I used 2 pieces of striping tape placed vertically and horizontally from the corner of the top square, then painted it with Love Diamond and peel off the tape immediately. Viola! My checker nails are done! 
For my pinkie and thumb I just covered half the nail with scotch tape, paint it over and peel off. Finished everything off with Glisten & Glow HK Girl top coat.


Too Fancy Lacquer This Love Is Smokin' Hot (bottle)

Too Fancy Lacquer Love Diamond (bottle)
I purchased this set from one of their distributors, Dazzled. Shipping rate is reasonable to Canada, and the process time is quick. Too Fancy Lacquer is also available to purchase from Color4Nails, or directly from their bigcartel shop.

XO
Novi

Tuesday, May 20, 2014

Swatches & Review: Girly Bits Cu Blue


Hi guys! Today I have a new-to-me polish from Girly Bits, called Cu Blue. It is a part of Slapdash collection, released in June 2012. 
Cu Blue is a deep blue jelly with copper shimmer. The formula on my bottle is thin, but not sheer. I used 3 thin coats for full and even coverage. Indoor, it looks like a deep vampy blue shade, but when I stepped out, the sun makes it look vibrant, in your face indigo blue. It's also a very flattering shade for my skin tone, or any skin tone I think. 
Overall, I think it is something worth getting, especially if you're a blue lover. One complain though, is that the pretty shimmer is more visible in the bottle, pictures than in person. But still, this is something I can see myself wearing again. 

The first the pictures are with glossy top coat (KB Shimmer Clearly On Top) and the last one is with matte top coat. I prefer the glossy look.

Girly Bits Cu Blue

Girly Bits Cu Blue

Girly Bits Cu Blue

Girly Bits Cu Blue

Girly Bits Nail Lacquer are made in Canada, hand blended and poured. It is also B3 Free, meaning free of formaldehyde, toluene and dibutyl phthalate (DBP) and made using the highest quality mica, pigments, and glitter. Packaged in a standard 15ml  bottle and kept mixed by two stainless steel beads. Girly Bits Nail Lacquer never tested on animals.

Girly BitsFacebook-Twitter-Instagram-Pinterest-Blogger-Bloglovin-Google+
Where to buy - Distributors

XO
Novi
**product is sent for my honest review

Sunday, May 18, 2014

Sunday Watermarble

Hey there! It has been quite a while since I posted a water marble mani, hasn't it? I wanna say it feels like riding a bike, but I wouldn't know cause I can't ride a bike haha! It feels easier when you are doing it often, but after a long pause like this I had worried. Is the water ok? Will the polish spread? How did I do that pattern I did before? 
So I just picked out 3 random polishes that caught my eye first and pray that they work, and they did! Beautifully, if I might add. I don't want to take these off.

The water marble was done over a white base. I used Picture Polish Totes and Chillax, and OPI Funky Dunkey. Top coated with Glisten & Glow HK Girl


XO
Novi

Friday, May 16, 2014

X Mark The Square?

Happy weekend! I've been digging short nails lately, so today I chopped mine really short again. If you're lazy *uhm* like me, this length feels so perfect, no need to file them every other day to keep the square shape. 
This mani I just did, I have no idea what to call this lol. I used all OPI polishes, Hey Baby, Can't Find My Czechbook, and Haven't The Foggiest. The studs are from Essence Nail Art Decoration Kit I picked up from Shoppers Drug Mart. The blue squares were made with the help of scotch tape, and I used nail art brush to paint the 'X'.


Have a wonderful long weekend!

XO
Novi

Tuesday, May 13, 2014

Swatches & Review: Girly Bits Love Ya Beach! (June A Box, Indied)

Hi guys! I'm excited to share with you one of the polish from the upcoming A Box, Indied that will be launched on May 26, 2014. With "Destinations" as the theme, Pam created this gorgeous glitter topper inspired by the beach on Pelee Island. 

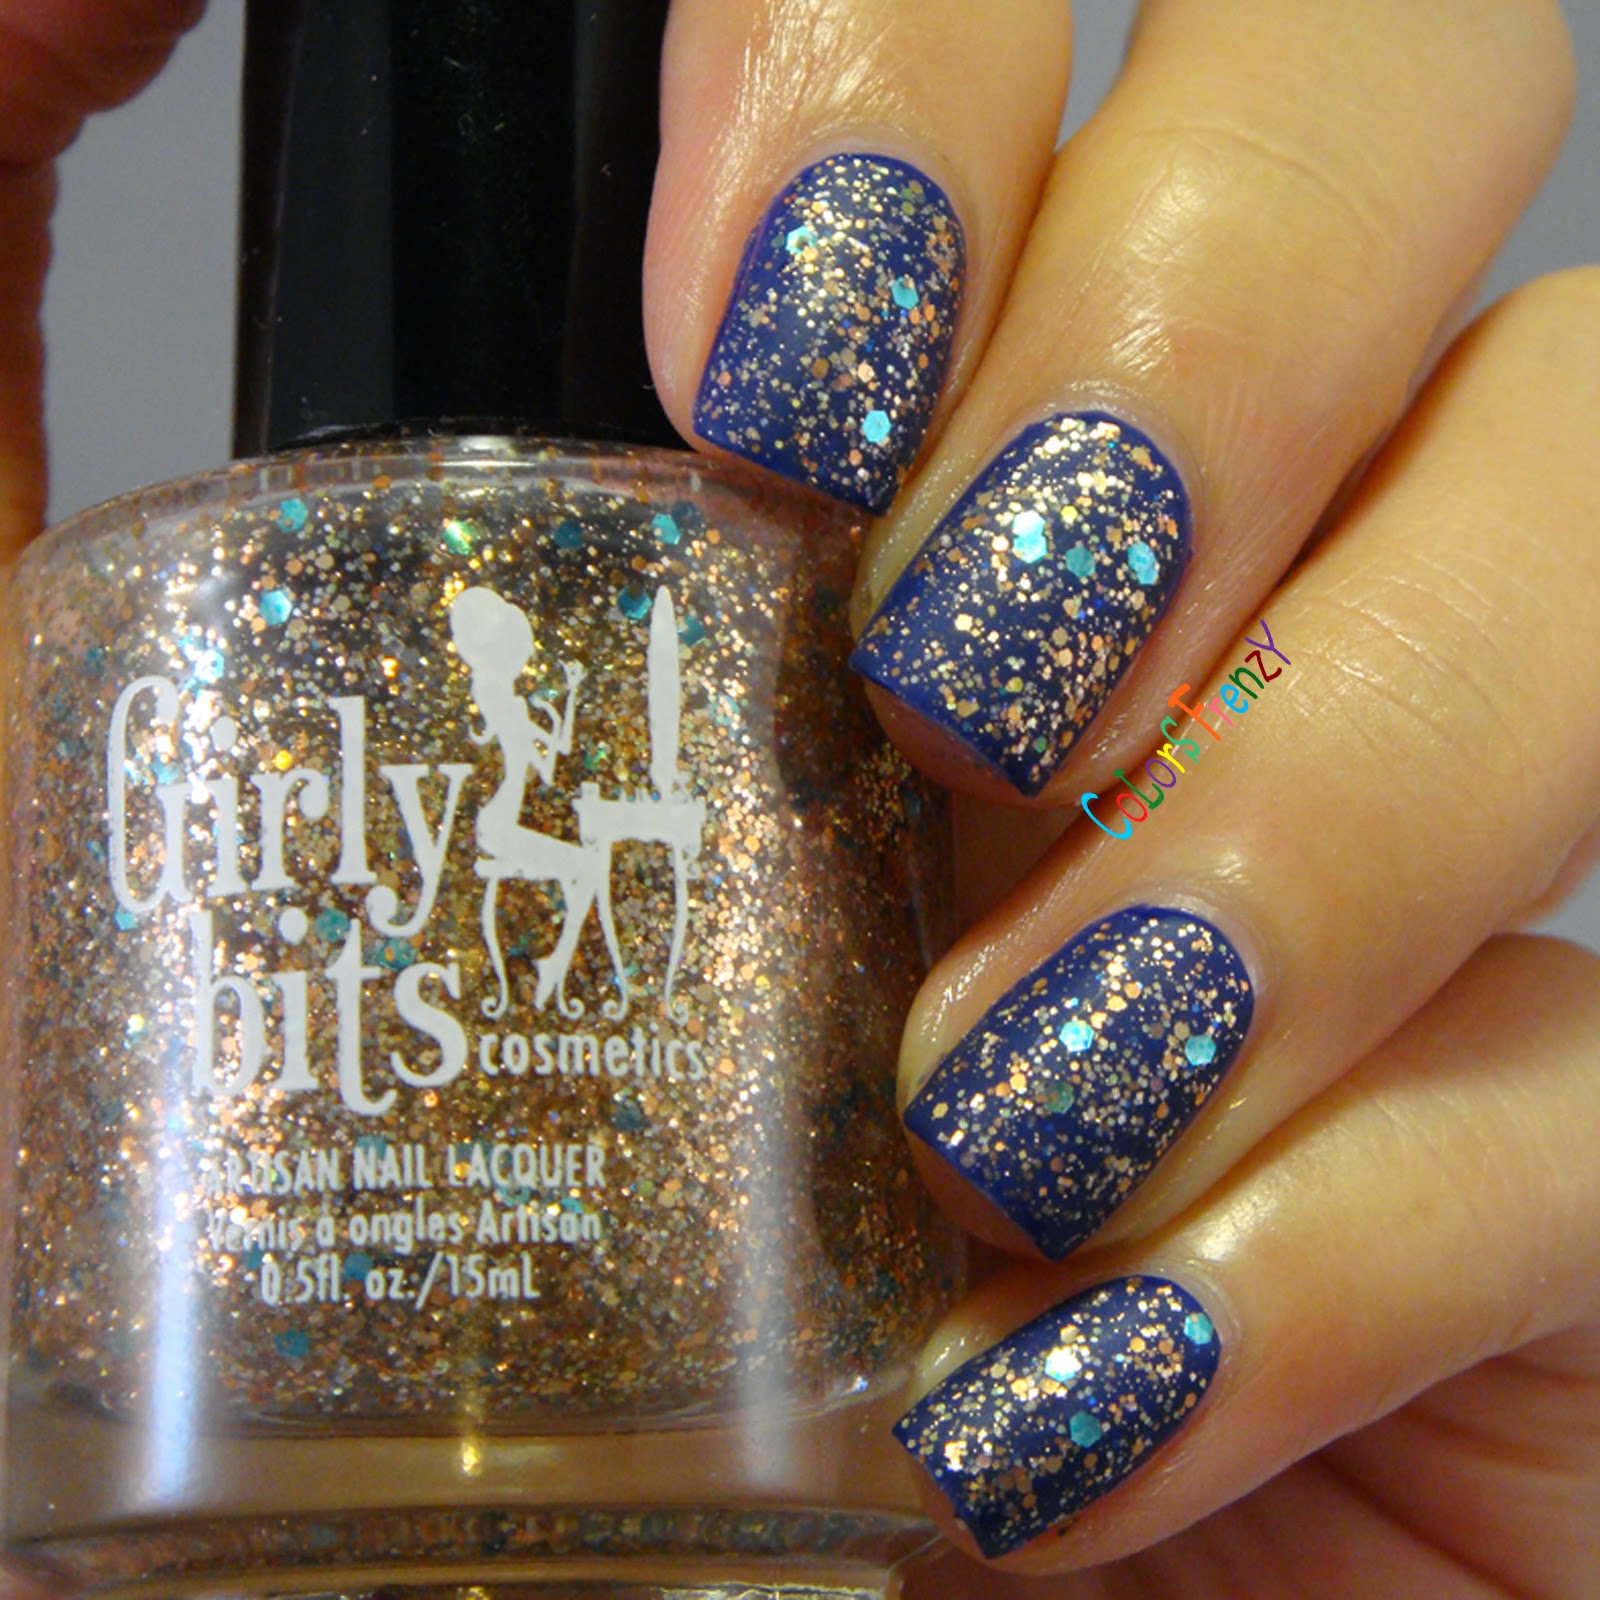
Love Ya Beach! is a clear based glitter topper with gold metallic glitter and blue hexes. According to Pam, the colours of the glitter here represent the sand, crushed shells, and beach glass. I sure love how the blue hexes peeking between the metallic sand glitter!

The glitter is dense enough you can wear it on its own with 3-4 coats. I tried using 4 thin coats, I had a little bit of vnl but you'd hardly see it unless it's on your face and it didn't feel chunky at all. I'm showing it here over a base colour so you can see the glitter better. 
To stick with the theme, first I'm showing it over a blend of blue and green to create a light sea foam colour. I did a saran wrap mani with Picture Polish Sky and Chillax over a white base, used 2 coats of Love Ya Beach! and KB Chimmer Clearly on Top.


Girly Bits Love Ya Beach!

Here's another look with a darker base (OPI Eurso..Euro) and matte top coat. LOVE how it looks mattified! 

Girly Bits Love Ya Beach!
Girly Bits Love Ya Beach! (matte)
Girly Bits Love Ya Beach!
A little bit about the brand, Girly Bits Nail Lacquer are made in Canada, hand blended and poured. It is also B3 Free, meaning free of formaldehyde, toluene and dibutyl phthalate (DBP) and made using the highest quality mica, pigments, and glitter. Packaged in a standard 15ml  bottle and kept mixed by two stainless steel beads. Girly Bits Nail Lacquer never tested on animals.

A Box, IndiedFacebook - Instagram - Where to buy


XO
Novi
**product is sent for my honest review

Sunday, May 11, 2014

piCture pOlish: Chillax & Badass Stripes

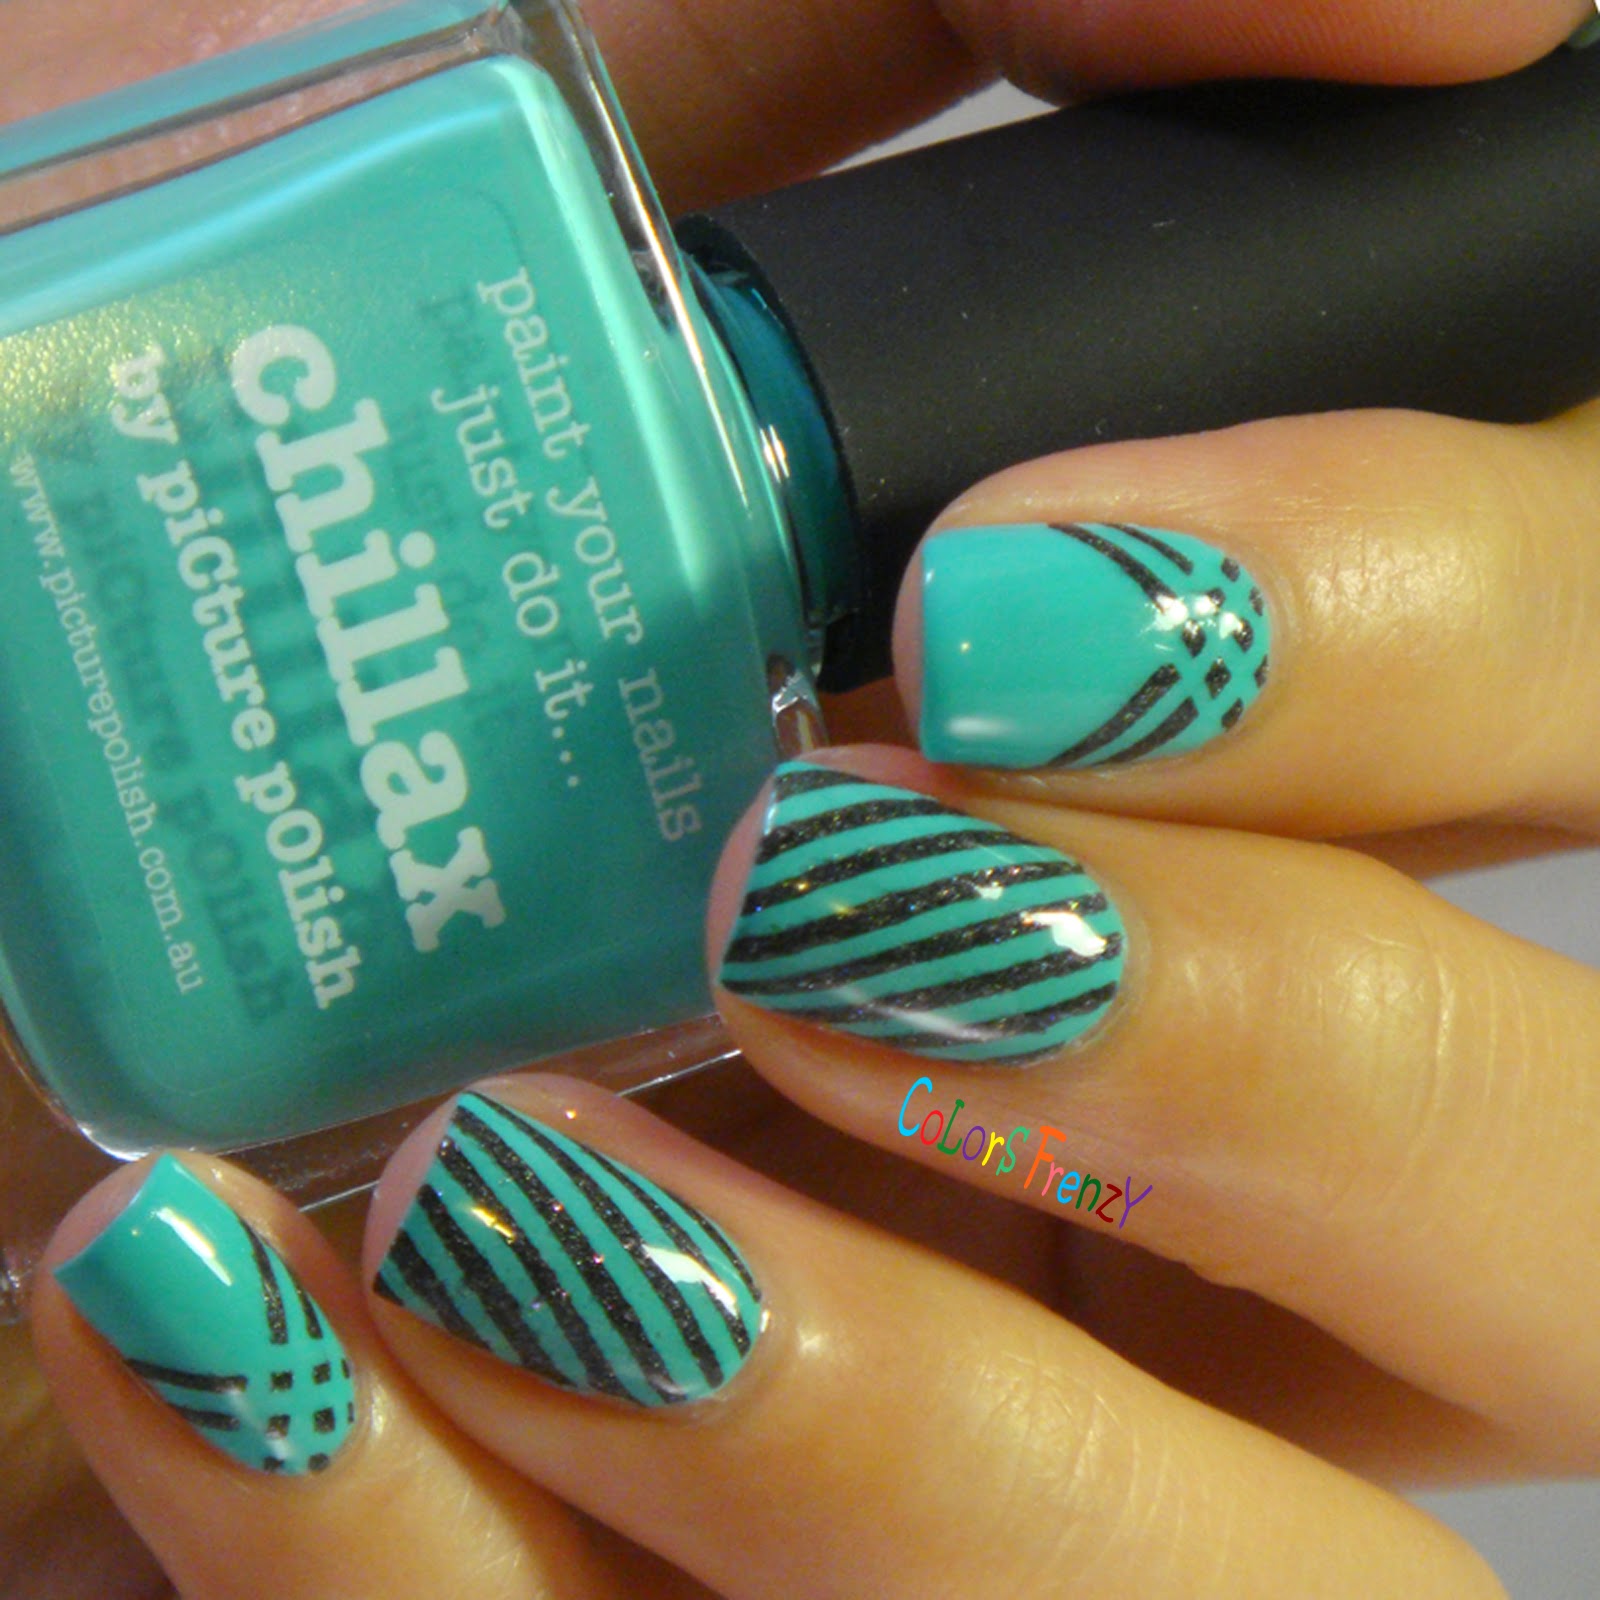
Hey there! It's been quiet here for the last few days, but I'm back! And today I have one of Picture Polish Urban Shades, Chillax. Love the name, love the color even more! The formula is perfection. Two easy coats. I'm telling you, if you love cream polishes, you have got to try Picture Polish creams. Feels like I always say the same think whenever I'm posting cream polishes from this brand, but it's the truth. 

Chillax is a bright mint green with blue undertone. Dries glossy, but I still use top coat for my swatch. It's also one of those polishes that is hard to capture and show its true color. My pc, laptop, and iphone are not showing the same color! It's is a touch greener than whatever you are seeing.

I used striping tape and piCture pOlish Badass to create the stripes, sealed off with Glisten & Glow HK Girl top coat.

piCture pOlish Chillax & Badass

piCture pOlish Chillax & Badass

piCture pOlish Chillax & Badass
I purchased this polish from Nail Polish Canada. You can also get them from Harlow & Co.Llarowe, or directly from Picture Polish, all offer worldwide shipping. 

XO
Novi

Wednesday, May 7, 2014

Pueen 59 & Colors by Llarowe "Oops"

Happy hump day! Today I'm wearing a simple stamp mani over a super gorgeous polish that's unfortunately is not available to purchase anymore since this is just a small batch prototype that didn't make it to the collection.
There are several version of 'oops' polishes, and I think this is the prettiest one (but I only have one haha). It's a color shifting base with scattered holo effect and holographic microglitter. The formula is a bit thick and dry gritty, I used 2 coats of top coat to smooth it out (before and after the stamp)


I used Pueen 59 from the Buffet set and Color Club Harp On It to stamp the design. Color Club holo never disappoint when used for stamping! Love them!


Close up look. Amazing, right?!


XO
Novi

Monday, May 5, 2014

piCture pOlish Twinkle and Pusheen The Cat

Hi guys! As I usually do, I like to have a fun manicure to share with you guys on Mondays, hoping that maybe it would brighten your day just a little bit :)

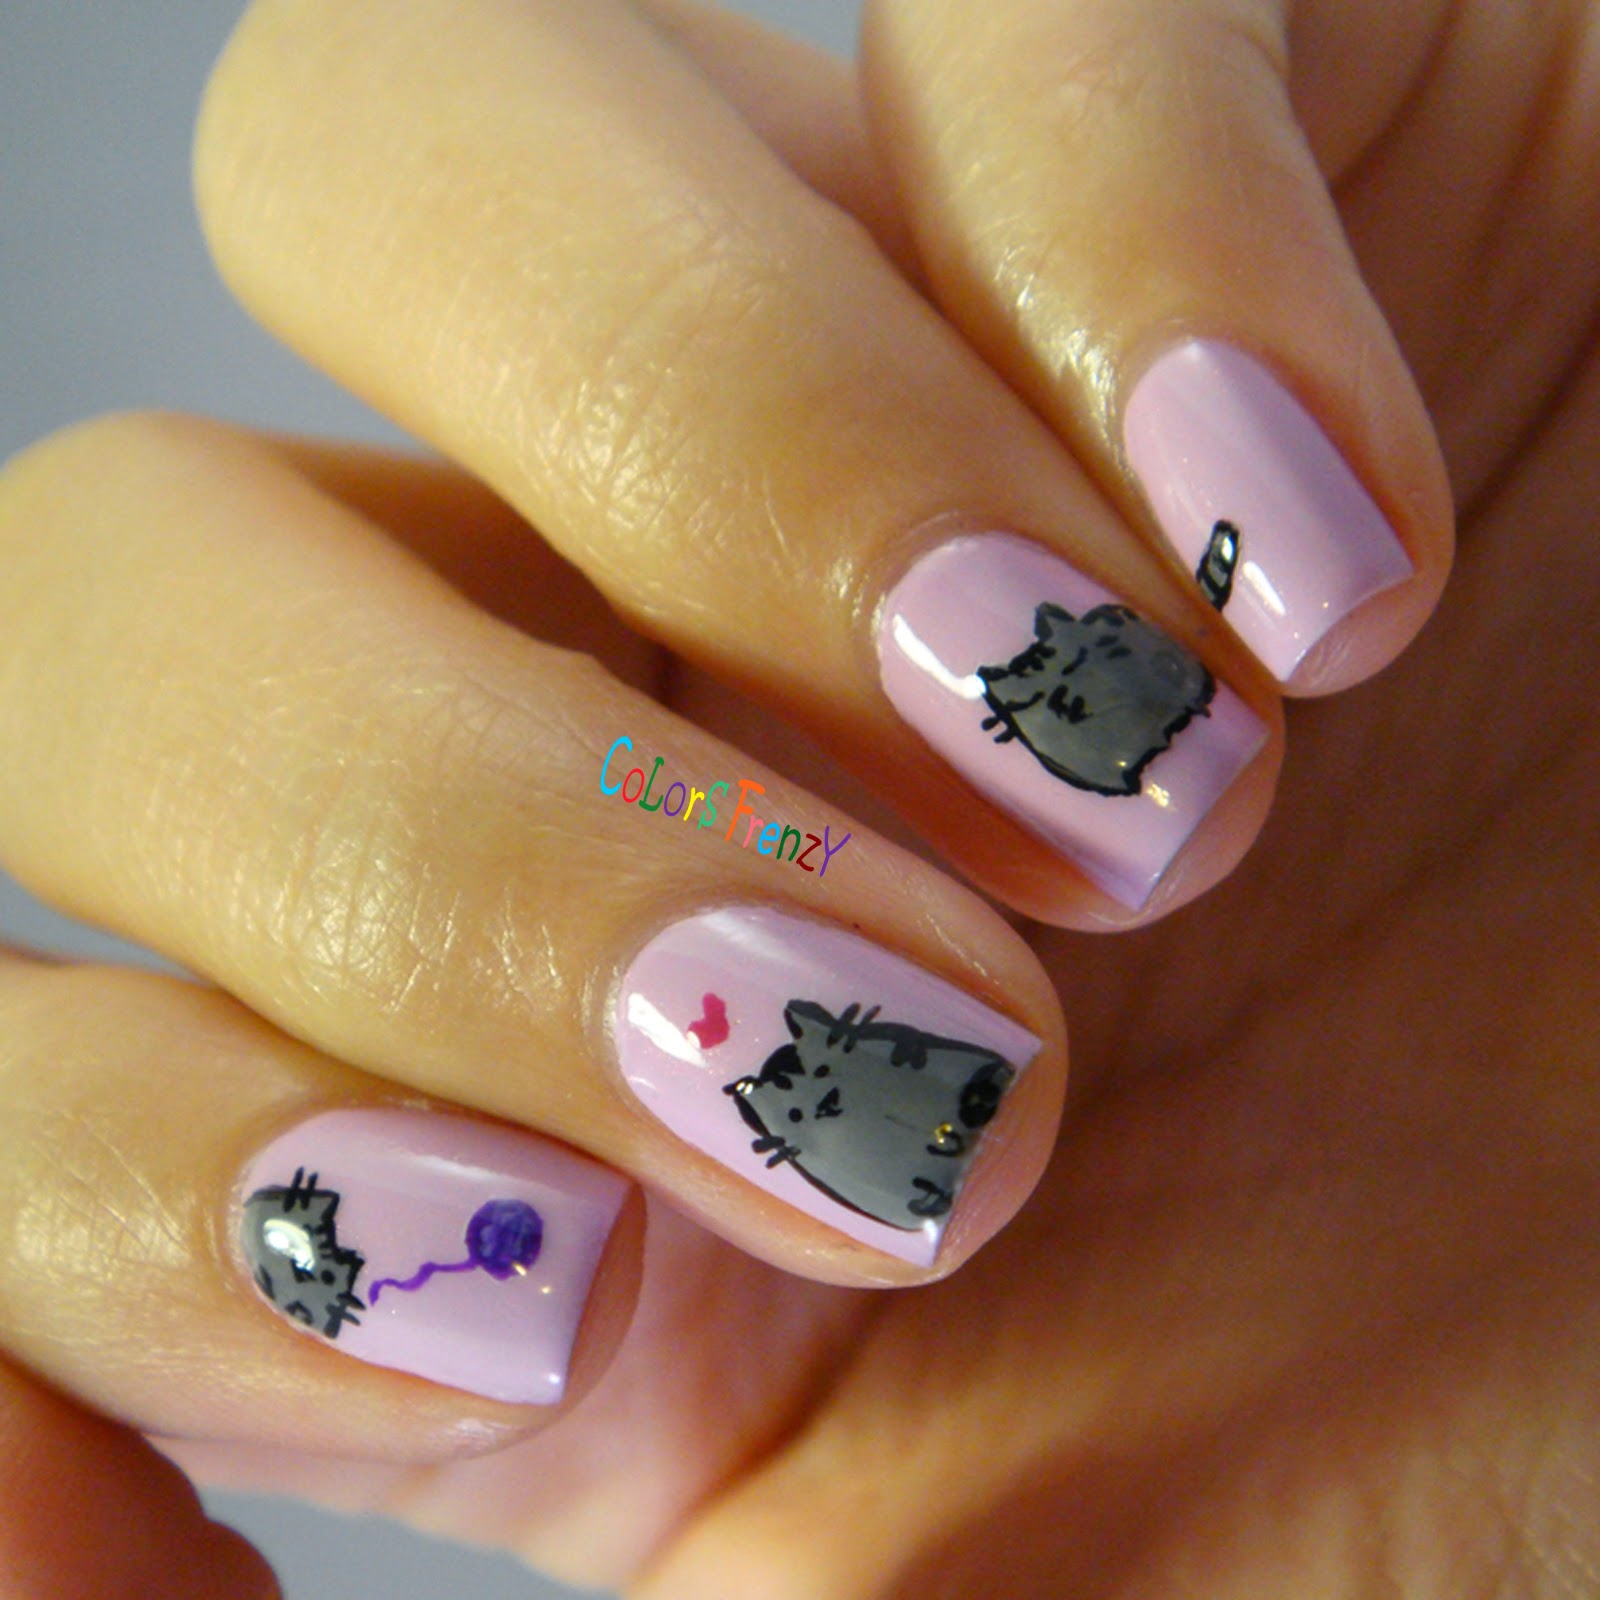
For the base of my mani, I'm wearing the lovely Twinkle by piCture pOlish. It's a lilac with pink undertone, with some silvery sparkles in it. Indoor it looks more pink, and more lilac-y when I see it outdoor. Formula is on the thick side, but still applies nicely. I used two coats for and achieved a perfect opacity.
Picture Polish Twinkle

Picture Polish Twinkle

I made a short video for how I painted Pusheen. I noticed when editing, the lighting is not bright enough. So I apologize if you couldn't see the video clearly.


You only need 3 polishes to paint Pusheen (2 if you do it over a white base):
White polish, I used OPI My Boyfriend Scales The Walls
Grey polish, I used Julep Meryl
Black polish, I used China Glaze Liquid Leather
As an alternative, you could replace black with a dark grey. But since Julep Meryl is the only grey creme polish I have, I do the outline with black.
Top coat used is Glisten & Glow HK Girl


Hope you enjoyed the post!

XO
Novi